Homemade probiotics for cats are a great way to supplement your cat’s diet, and probiotic yogurt is one of the easiest to make. The best probiotic yogurt for cats is homemade probiotic yogurt. Read this guide to find out just how easy it is to make your own homemade probiotic yogurt for cats that your felines will love.
DISCLAIMER: This post may contain affiliate links. If you click one of these links and decide to make a purchase, we may receive a small commission. This comes at no extra cost to you and helps to keep the site alive and up to date. If you want more information, please review our Privacy Policy. Thank you for your support!
Is Yogurt Safe For Cats?
Although cats are known to be lactose intolerant, they can safely ingest probiotic yogurt. That’s because yogurt is very low in lactose and relatively high in protein. Yogurt is not only safe for cats, it can actually be quite healthy for them.
Probiotic yogurt is rich in friendly bacteria that support digestive health and the immune system. It can be especially beneficial to cats suffering from IBD or struggling with other digestive issues, like vomiting, diarrhea or constipation.
Related Post: Probiotics For Cats: Can Cats Have Yogurt?
Yogurt is known to contain healthy probiotics. But can cats have yogurt, even though they are lactose intolerant?However, not all probiotic yogurt is safe for cats. Most probiotic yogurt products sold at supermarkets contain too much sugar, fats, salt and additives that are bad for cats to consume.
The only yogurt that is truly safe for cats to eat is low fat, probiotic yogurt without any added flavors or preservatives. And the best way to ensure that you are giving your cat an all natural, healthy product is to make homemade probiotic yogurt for cats.


Is It Difficult To Make Probiotic Yogurt For Cats At Home?
Homemade probiotic yogurt is one of the easiest things to make. The whole process is as effortless and foolproof as it gets. And it doesn’t require a load of expensive equipment either. Well, it can, but it doesn’t have to.
All you need to make homemade probiotic yogurt for cats is milk, a starter culture, a jar or container, and a “yogurt maker”.
What Is A Starter Culture?
Starter culture is used to refer to the bacteria you use to turn your milk into yogurt. You can buy these bacterial cultures in the form of a freeze dried powder, or you can essentially harvest your own from a premade, probiotic yogurt.
Freeze dried starter cultures will generally result in a higher concentration of bacteria in your first batch of yogurt, but the bacteria themselves won’t be as active yet. Because of this, your first batch of homemade probiotic yogurt will likely be very runny.
The beauty of the whole yogurt-making process is that you can repeat it over and over again with the same starter culture. Over time, the amount of friendly bacteria will grow and they will become more active, leading to a richer, thicker yogurt.
In our experience, homemade probiotic yogurt made with a packet of starter culture bacteria has more longevity compared to starters made from premade probiotic yogurt from the supermarket. It is also more likely to turn out a success, because you are using actual live bacteria. With store-bought yogurt you can unfortunately only guess what you are actually putting in there.
What Is A Yogurt Maker?
A yogurt maker is nothing more than a device to keep your yogurt container at a constant temperature over a long period of time. This could be as simple as a steamer basket on a stove. However, that is not the most practical way to do it, as it will take your bacteria approximately 12 to 24 hours to turn milk into yogurt.
If you have a slow cooker or Crock-Pot, you can use that. Most commercial slow cookers have a limited timer, so you will probably need to reset it once or twice during the process.
If you do not own a slow cooker and don’t want to make such a large investment, you can use a non-electric yogurt maker. A non-electric yogurt maker is basically a double-walled thermos container that you fill up with boiling water. You then set your yogurt container inside, close the thermos and let it sit. Easy and environmentally friendly.
If that sounds like too much of an effort for you, and you have the funds available, we suggest you get yourself set up with an electric yogurt maker. These are available in varying sizes and with varying price tags. Just set your yogurt container inside, plug in the yogurt maker and wait.
Can I Use Vegan Milk To Make Yogurt For Cats?
While technically you can use vegan milk products such as soy or coconut milk as a base to make homemade probiotic yogurt, we strongly advise against it when making probiotic yogurt for cats. Cats are obligate carnivores, which makes them the polar opposite of vegan. Their digestive systems do not function the same way as ours and we need to respect that by giving them a proper, meat-based diet. Any dairy products included in that diet should therefore also come from animal sources. The best probiotic yogurt for cats is made with milk from a cow.


Regular Yogurt VS Greek Yogurt
The main difference between regular and Greek probiotic yogurt is that Greek yogurt is higher in protein and contains less natural sugars. As such, Greek probiotic yogurt is the best kind of probiotic yogurt for cats.
Nevertheless, regular probiotic yogurt is a lot easier to come by for most of us, and it is still perfectly suitable for cats. The recipe we give applies no matter the type of starter culture you use.
How Much Yogurt Can A Cat Have?
As with all good things, homemade probiotic yogurt for cats should be enjoyed by cats with moderation. An adult cat should get no more than 1 to 3 teaspoons of plain, unflavored probiotic yogurt a day, depending on their size. This is also the perfect amount for administering powdered supplements and medications to my cat, I have found.
We advise against giving probiotic yogurt to healthy kittens that are still nursing with their mother, since they are already getting all the nutrients they need. Their mother, however, could use the extra calories while she is nursing.
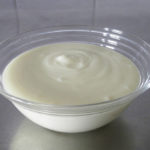
Don’t worry about leftovers, because there shouldn’t be any. What’s good for your cat is also good for you and your family. And homemade probiotic yogurt tastes so much better than store-bought yogurt. It is much less sour and so rich and creamy. One taste, and you’ll be hooked.
Homemade Probiotic Yogurt For Cats Recipe
This recipe produces approximately 10 to 13.5 ounces (300 to 400 ml) of yogurt. You can safely double the ingredients for the double amount of yogurt. The only note to make is that, if you are using probiotic yogurt as a starter, 6 tablespoons is all you need regardless of the amount of milk you use.
We use a non-electric yogurt maker from EasiYo, specifically the EasiYo 500g. Any times mentioned in the recipe presume that you are using a non-electric yogurt maker as well.
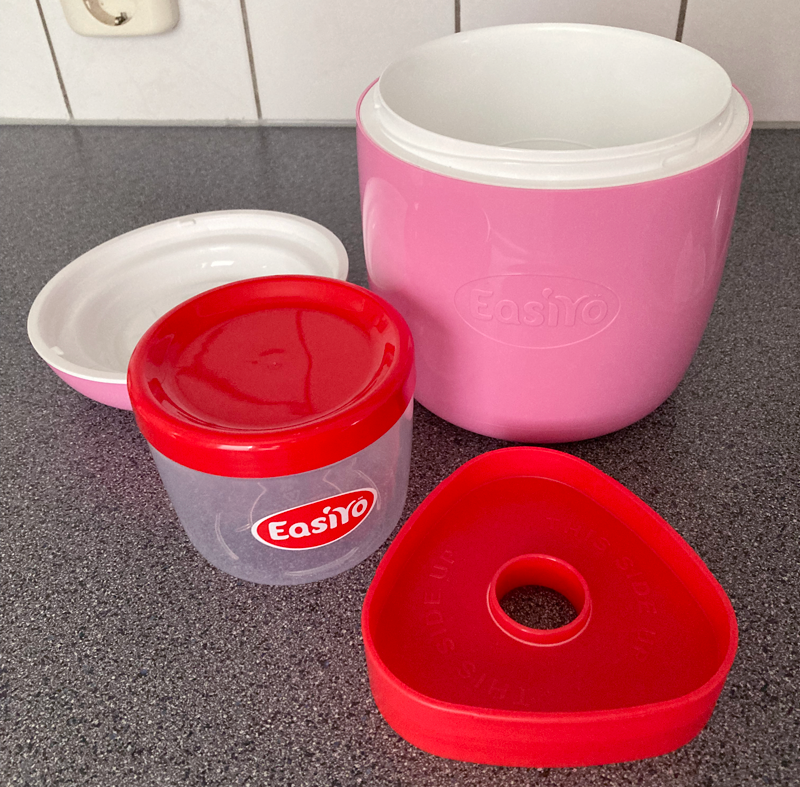
a 500ml clear container.
If you are using an electric yogurt maker instead, check its manual or the manufacturer’s website for exact usage instructions.
If you are using a slow cooker or Crock-Pot, use some crumpled up aluminum foil to create a base for your container to sit on. You want to make sure that the container isn’t touching the bottom or the sides of the slow cooker, while also having some space between the container and the lid. Keep the temperature set to “low” and follow the recipe’s instructions.
Ingredients
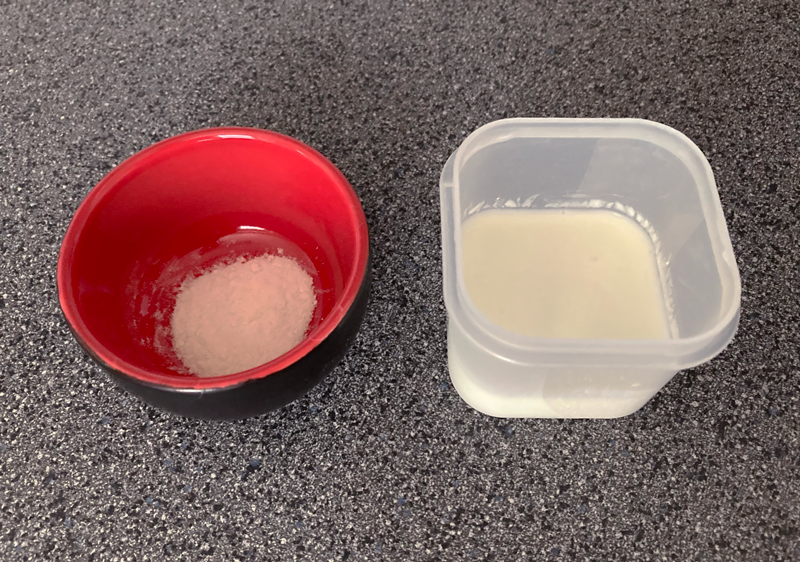
- 13.5 oz (400 ml) pasteurized milk at room temperature
- ½ packet freeze dried starter culture, OR
6 tbsp probiotic yogurt at room temperature
Equipment
- yogurt maker
- 17 oz (500 ml) sealable container
Step 1 – Prepare Ingredients
Add your starter culture or probiotic yogurt to 100 ml of the pasteurized milk and mix well. Once thoroughly mixed, add the rest of the milk and stir until fully combined. Pour the mixture into your yogurt container and seal the lid.
Step 2 – Prepare Yogurt Maker
Put on a kettle of water and bring it to a boil. Once the water is boiling, fill your yogurt maker up to about a quarter of an inch above the base.
Step 3 – Make Yogurt
Place your closed container into your yogurt maker. Be careful not to burn yourself on any steam coming from the hot water. Make sure the container is level and standing stable on its base, then close the lid of your yogurt maker.
Set a timer for 12 hours.
If this is your first batch of yogurt from a new starter culture
After the first 12 hours are over, replace the now cooled down water with a new batch of boiling water and close the yogurt maker. Reset the timer for another 12 hours.
If you are using a slow cooker, you do not need to replace the water. Just reset the timer for another 12 hours.
Step 4 – Check The Result
After the full 12 or 24 hours are over, it is finally time to see how your yogurt came out. Open your yogurt maker and take out the container.
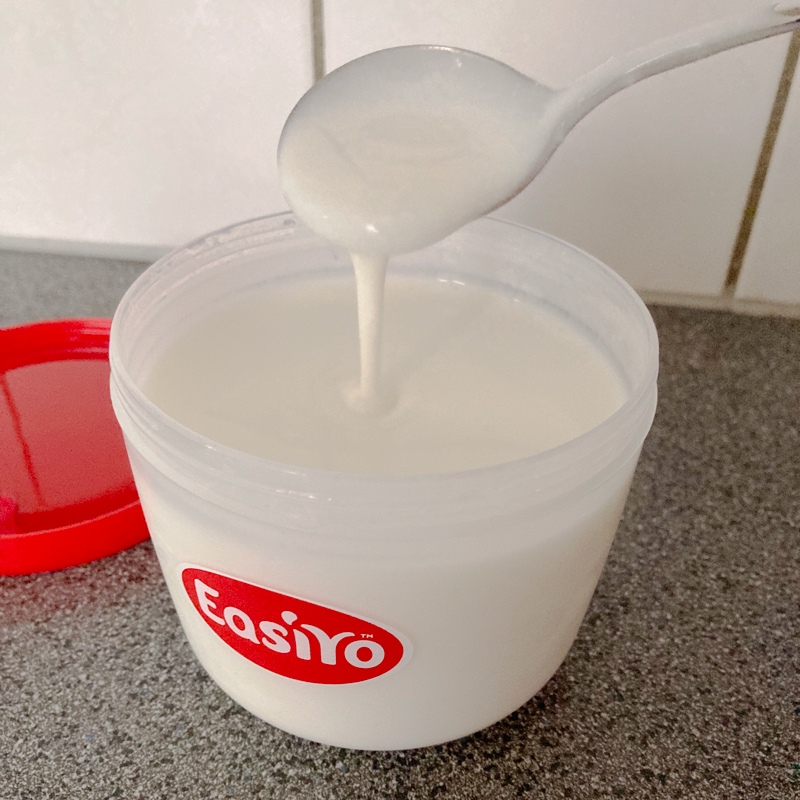
Once you open the container you will see that there are two layers: a curdled, white substance on the bottom and a yellowish, watery substance on the top. Carefully drain off as much of the water as you can. Then stir or whisk what is left in the container until the texture is smooth.
If you want to reuse your starter culture for a new batch
Take 6 tablespoons of your freshly created yogurt and put it in a separate, clean container. Do this before adding any flavors or additives and while the yogurt is still fresh. This will be your starter for your next batch. You can keep this in the fridge for up to 48 hours.
At this point, your probiotic yogurt will still be quite runny, because it is still warm. Place it in the fridge for 3 to 4 hours to cool off and thicken. After this, it is ready to be eaten by you and your cats within 72 hours.
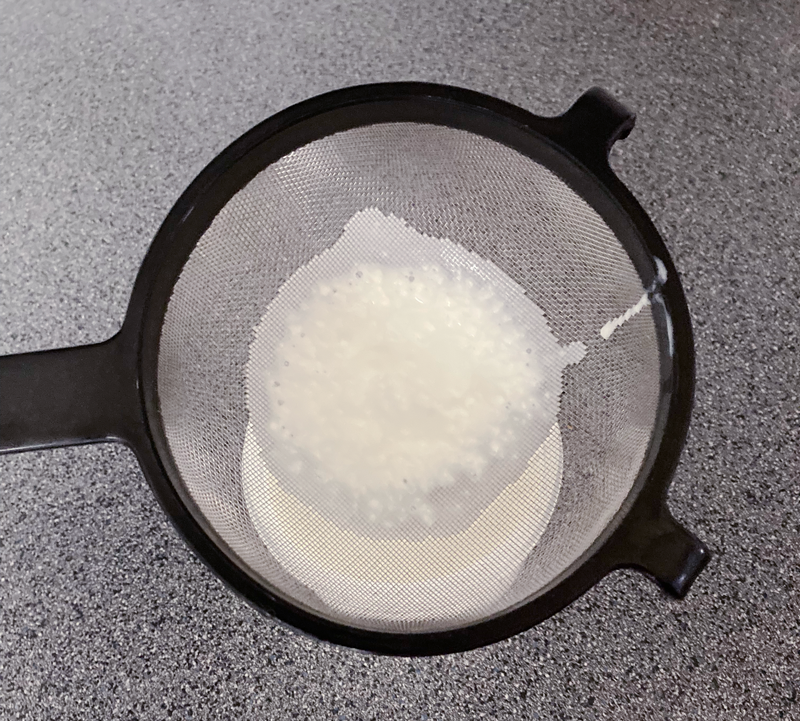
If you want a smoother texture, try straining the yogurt through a fine sieve or a cheesecloth. To really indulge yourself, add a bit of full cream and fresh fruit to your yogurt. But, of course, you should stick to plain probiotic yogurt for cats.
Related Posts